Step 1 - Select Who
Step one determines the people who will appear in reports, labels, or statements. Filters can be comprised of membership data and donations data in unlimited possible combinations.
Queries are a search in which you define a set of criteria that people in your database must meet in order to be included in the Report, Labels, or Find Grid. This tab can filter based on information in People records and can be combined with giving and pledging history from Donations.
Edit People Selection Criteria

-
This area allows you to use criteria entered into People records in Membership.
Select Membership Field

-
Bracketed items at the top of the list offer more advanced selections.
Add Criteria
-
Click
 to add criteria to the summary in the lower left.

-
Combine multiple pieces of criteria with
 and
and  .
. -
Group conditions with

 .
. -
Remove a line of criteria with
 and clear all selections with
  .
.
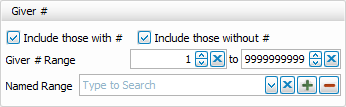
Giver # Criteria
-
This window allows you to use Giver #s as a criteria for inclusion. You can set your own range or define custom ranges.
Example: Envelopes in the 300s are for Children
Family Category
-
Categories are a part of Family Records (People Records) and will include all individuals in families within the selected categories.
Include Inactive, Groups, and Donations Records

-
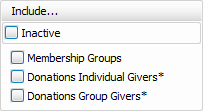
The Include... area allows you to add People records that have been marked inactive. These records are in addition to the criteria added in the left of the screen.
-
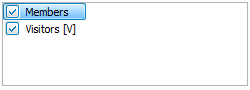
Include Membership Groups to list them along with individuals.
-
Include Donations Individuals and Donations Groups, though as fields in Donations are limited, this will add all Donations records regardless of the criteria on the left of the screen. Giving/Pledging Criteria will still apply.
Advanced Criteria
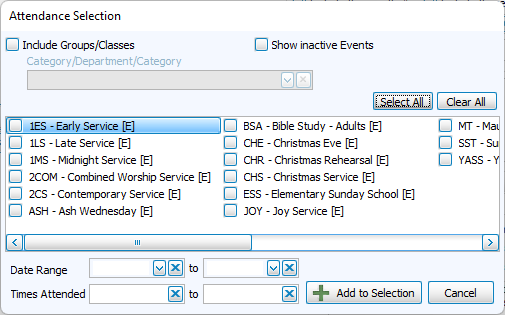
Attendance
-
Filter attendance or lack of by Event or by Groups/Classes
-
Specify Date Ranges and/or Times Attended
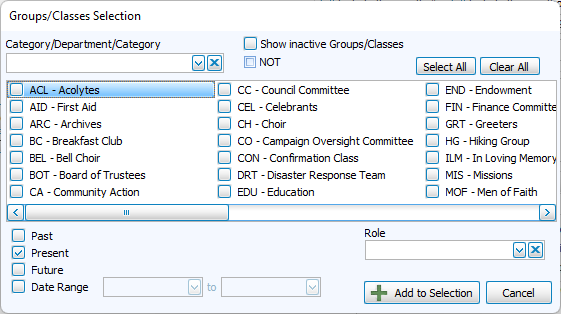
Groups/Classes
-
Filter by enrollment in groups or classes.
-
Specify date range of enrollment or all past, present, or future members.
-
Filter by roles assigned within a group.
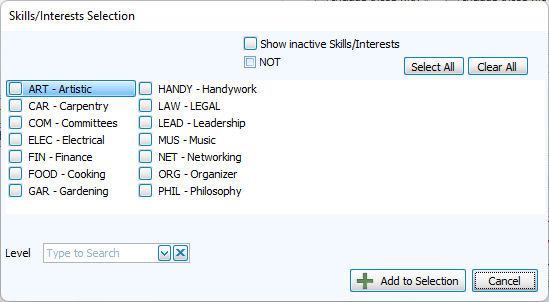
Skills/Interests
-
Filter by assignment of skills or interests.
-
Narrow by level specified within a skill.
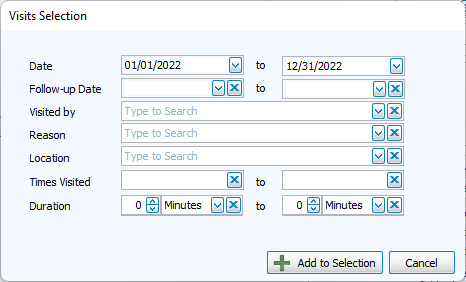
Visits
-
Filter by visit history.
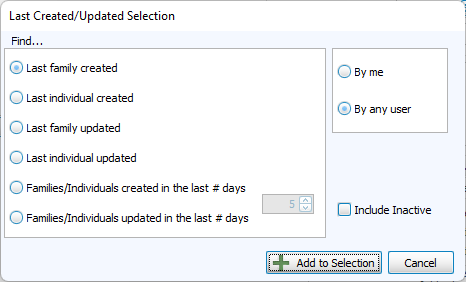
Last Created/Updated Selection
-
Filter by last updates to the record or date created.
-
Select for updates made by all Church Windows users or just the current log in.
Criteria by Field Type
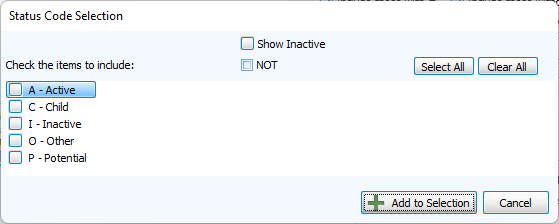
List Fields
-
Check list items that meet criteria or check NOT to exclude checked list items.
-
Checking Show Inactive will display inactive codes.
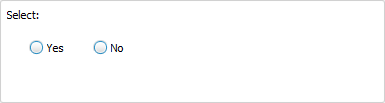
Yes/No Fields
-
Check boxes can be used as criteria with yes or no selection.
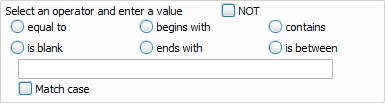
Character Fields
-
Text entries can be searched in their entirety or partially.
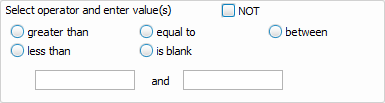
Numeric Fields
-
Number fields can be searched with parameters and ranges.
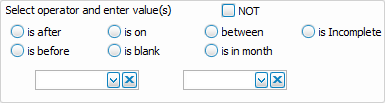
Date Fields
-
Date fields can be filtered before, after, in a range or by month.
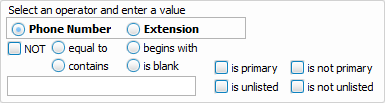
Phone Fields
-
Phone numbers can be searched in entirety or partially.
-
Specify criteria to primary or unlisted status. Display instructions for unlisted numbers are set in Step 2.
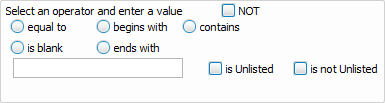
Email Fields
-
Email addresses can be searched in entirety or partially.
-
Specify unlisted status.
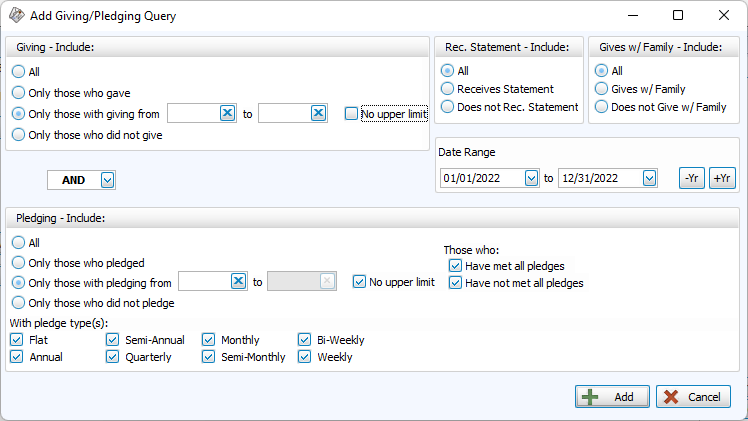
Giving/Pledging Selection Criteria
-
This area is used to generate a list of people based on their giving and/or pledging history within the indicated date range.
-
Use the Rec. Statement and Gives w/ Family boxes in the upper right allow you to filter based on these check boxes in Manage Givers.
Accounts Tab
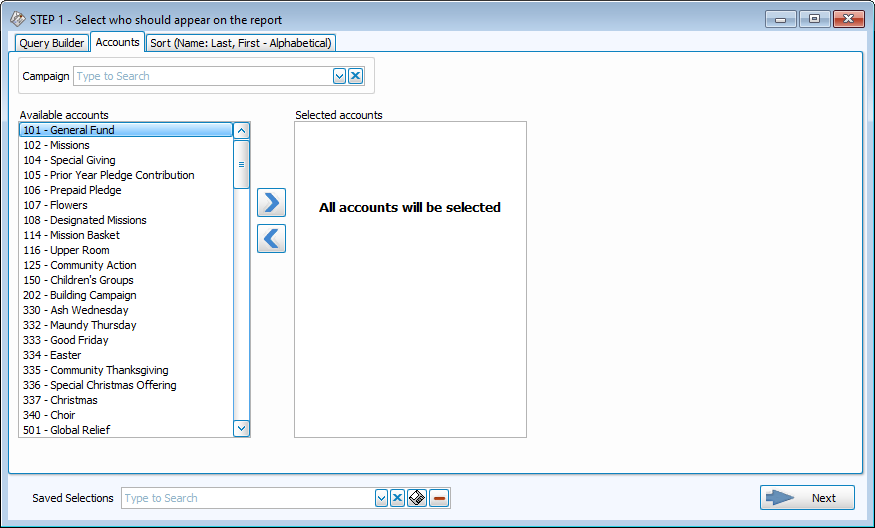
- Select participants of a specific campaign with the drop down at the top of the window.
-
Move columns you want to include to the right, and columns you want to exclude to the left.
-
Use the
 and
and  or double click to move a column to the opposite side.
 -
To select multiple columns at once
-
Click + CTRL - Selects multiple lines in any order
-
Click + SHIFT - Selects a range of lines in row
-
Sort Tab
Sort fields allow you to order information. The first takes priority, when those are all the same, the program will sort within that section by the selection in the second, and then the third.
-
Sort in Ascending (A-Z, 0-9) or Descending (Z-A, 9-0) order.
-
Click
 to restore defaults.
-
When Sort Field 1 contains a date field, you can also decide whether you want your sort to be:
-
Chronological Order (Year > Month > Day)
-
By Month (Month > Day > Year)
-
By Month and Day (Month > Day)
-
Save Selections
You can save the criteria you've built in Step 1 - Select Who with Saved Selections. To save a set of criteria and sort preferences, set up your query and click the  . Give the selection set a name that you can select from the drop down to use that criteria in another Report, Labels or Find query. If you make changes or add criteria to a Saved Selection, you'll be asked whether you want to update your query or use a one time change when you click next to go to Step 2 - Layout.